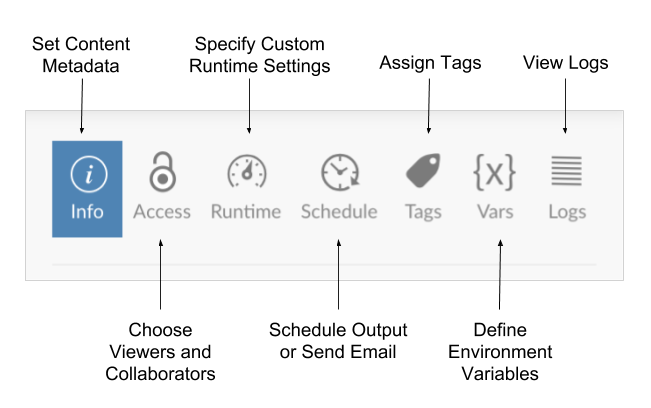
4 Content Settings Panel
This chapter contains an overview of the Content Settings Panel available to publishers and administrators. Content settings are available for each content item and can be accessed by opening a piece of content through the RStudio Connect user interface. The settings panel opens to the Access tab by default.
To toggle the settings panel open and closed, click on the settings icon (shaped like a gear) in the upper right menu options list. To hide access to the content controls altogether, share content in Open Solo mode (located under the more icon in the upper right menu options list).
4.1 Info & Content Metadata
After your RStudio Connect content has been published, you can change its title, add a description, and upload a content image to make it easier for others to find your content.
First, open the content and click on the “info” tab.
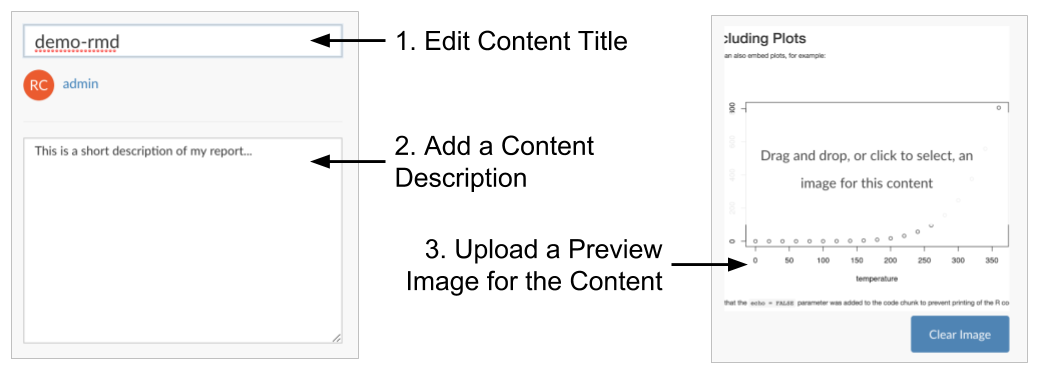
The top text field is the application title. This defaults to the application name if it was given. Other users will not be able to edit this field unless they are collaborators or administrators.
The large text area is the application description. You can describe the content in this field, or add other information that you feel is important. Other users will not be able to edit this field unless they are collaborators or administrators.
The area that displays a prompt to select an image for this content is the content image field. You can upload a jpeg, png, gif, or svg image that represents the content. Unlike title or description, users who cannot view the content (including administrators) will also be unable to view the image you have uploaded. This way, if you wish to upload a screenshot of the content, any information contained in that screenshot will not leak to users who would not otherwise be able to access it.
4.2 Access
After publishing a piece of content to RStudio Connect, the Connect user interface will open to show the access panel.
There are three types of user interaction settings available to publishers in this panel:
- Viewer Access (who can see this content)
- Collaborator Access (who can change this content)
- Execution User (which server user will run the content)
The final setting for creating a vanity URL is reserved for administrators only.

4.2.1 Viewer Access Settings
The default access settings are setup such that only the publisher will be able to view this new piece content. This means that the content will not be visible to other users on your RStudio Connect server until you change the access settings here.
There are several visibility options, arranged from most open to least:
- Anyone - no login required
- All users - login required
- Specific users or groups
- You (default)
Choosing Specific users or groups will allow you to specify individual named
user accounts or groups registered on the RStudio Connect server with help from
auto-complete text lookup.
4.2.2 Collaborator Access Settings
To enable multiple users to maintain and update a single piece of content on
RStudio Connect, all users should be listed as collaborators on the content.
Adding collaborators will automatically change the default viewer access
setting to Collaborators & you.
See the section on Publishing with Collaborators to read about the best practices for collaborative development and data product management on RStudio Connect (Section 3.2).
4.2.3 Execution User Settings
By default, the content will run on the server as the rstudio-connect user.
You may need to use an alternate user depending on resource permissions and
constraints. If you specify a user, they must be a member of the Unix group
that is the primary group of rstudio-connect.
Define who runs this content on the server:
- The default user
rstudio-connect - An alternate user
4.2.4 Custom Vanity URL
Administrators can create a custom vanity URL for a piece of content. The custom URL is appended to the server domain to form the complete path to the content.
Vanity URLs can be useful for all published content types. The example below demonstrates how creating a custom vanity URL for a plumber API will update the base URL to a cleaner, more user-friendly address:

4.3 Runtime
RStudio Connect is built to scale content. Publishers and administrators have access to runtime settings to help tune and scale their applications and APIs. The primary concern for scaling content in RStudio Connect is understanding when and how R code will be executed on the server.
A powerful component of RStudio Connect is the ability to host data products that require backend processes during a user’s visit. Examples include shiny applications and R Markdown documents with runtime::shiny, plumber APIs, and TensorFlow APIs. In the case of Shiny, an end user’s browser (the client) is connected with an R process running on the server. When a user changes an input, the client sends a message to the server and a portion of R code is re-run. The server sends back the result as output. In the case of APIs, a client makes a request which is sent to a running process, and the results are sent back to the client.
If runtime is not applicable to the content type (e.g. static/batch content including: documents, plots and HTML files), you will see a message stating that there are no runtime settings to configure. RStudio Connect is able to update static content on a schedule (see section 4.4).
Changes to runtime settings are applied immediately to running instances of this content. New connections use updated values. Existing connections are not modified or disconnected.
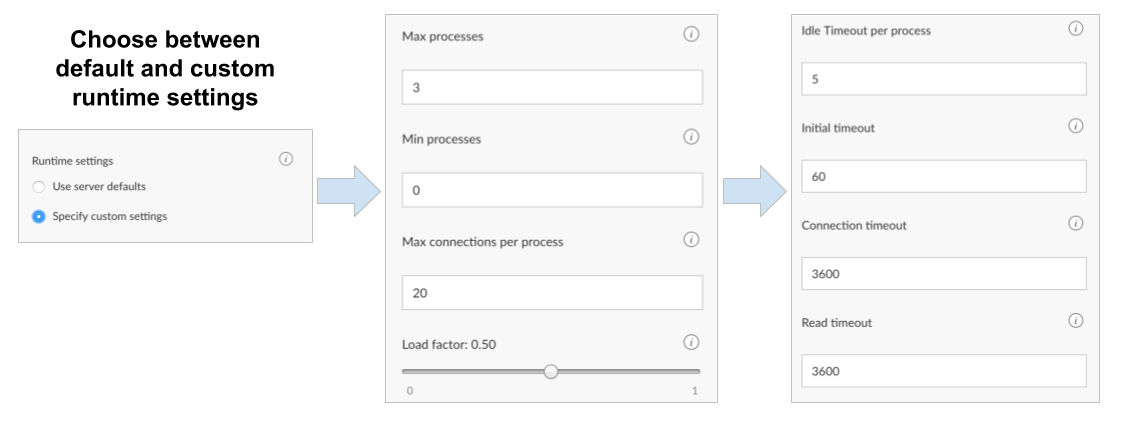
4.3.1 Process Configurations
- Max processes: The maximum number of processes that will ever be simultaneously running for this content, regardless of load.
- Min processes: The minimum number of processes that will be kept running for this content, regardless of load.
- Max connections per process: The maximum number of client connections allowed to an individual process. Incoming connections which will exceed this limit are routed to a new process or rejected.
- Load factor: A value between 0 and 1 which determines how lazily additional processes will be spawned to handle incoming load for this process. At the highest setting, Connect will only spawn additional processes when existing processes are not allowed to accept an additional connection. At the lowest setting, Connect will create many new processes as new users arrive to handle the load.
4.3.2 Timeout Configurations
- Idle timeout per process: The minimum time a worker process remains alive after it goes idle (in seconds) - i.e. no active connections.
- Initial timeout: The maximum time to wait for an app to start (in seconds).
- Connection timeout: The maximum time allowed without data sent or received across a client connection (in seconds). A value of 0 means connections will never time-out (not recommended).
- Read timeout: Maximum time allowed without data received from a client connection (in seconds). A value of 0 means a lack of browser interaction will never cause the connection to close. This is useful when deploying dashboard applications which send regular updates but have no need for interactivity.
4.4 Schedule & Emailing
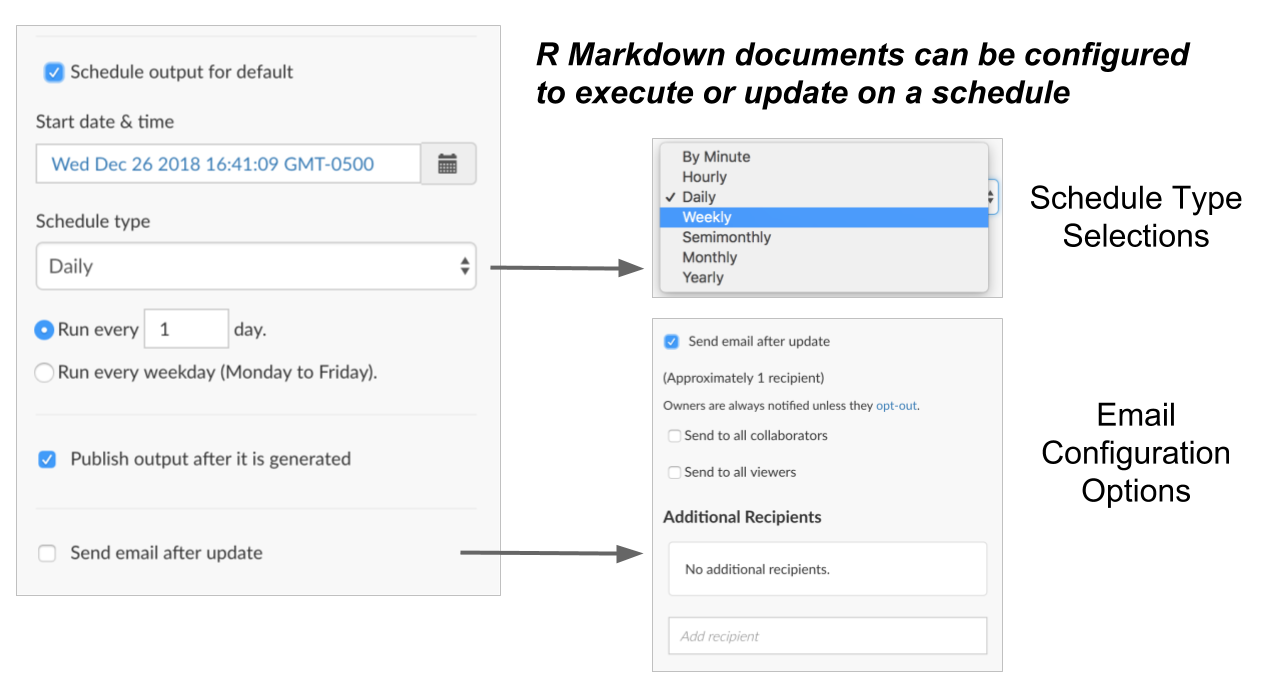
This panel is available for content types that can be rendered on a schedule. If scheduling is not applicable to the content, you will see a message stating that there are no settings to configure.
The scheduling customization options available depend on which “schedule type”
you choose. For example, selecting the daily schedule type allows a choice
between running the report every x number of days or every weekday.
Documents can also be set up to contain an email template which triggers delivery to a list of desired recipients on the output schedule.
A full description of all scheduling features is available in the chapter on R Markdown (see Chapter 6).
4.5 Tags
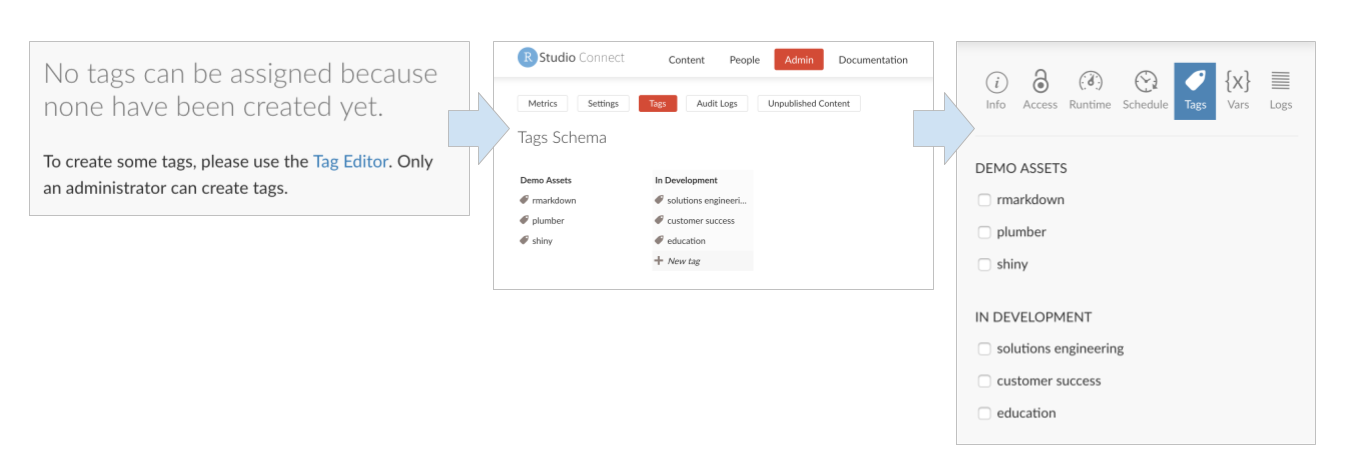
RStudio Connect administrators can create tags and a tag schema using the Tag Editor. If no tags have been created, you will see a message in this panel stating that no tags can be assigned (shown below).
Once an administrator has created tags, use the checkboxes to apply them to your content. Tags make content organization, discovery and filtering easier across the RStudio Connect dashboard.
4.6 Vars (Environment Variables)
When developing content for RStudio Connect, you should never place secrets
(keys, tokens, passwords, etc.) in the code itself. Best practices dictate that
this kind of sensitive information should be protected through the use of
environment variables or another method of configuration such as the config
package.
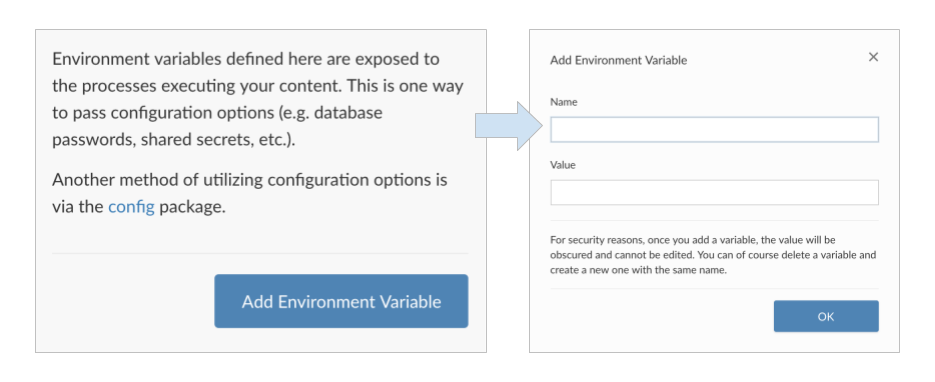
The Vars panel makes it easy to define environment variables which are then exposed to the processes executing your content. Note that there is no way to define environment variables prior to publishing content. If your content code relies on environment variables, publish it in an initial ‘broken’ state, then add the environment variables through this pane before sharing or testing the content.
Click on the Add Environment Variable button, then provide a name and value
for your environment variable. For security reasons, once you add a variable,
the value will be obscured and cannot be edited. You can always delete a
variable and create a new one with the same name.
Note: Documents must be published with source code to be executable. Static document content will not be able accept environment variables.
4.7 Logs
The logs panel contains execution details for each launched process associated with the piece of content. Standard output and standard error are captured and available.
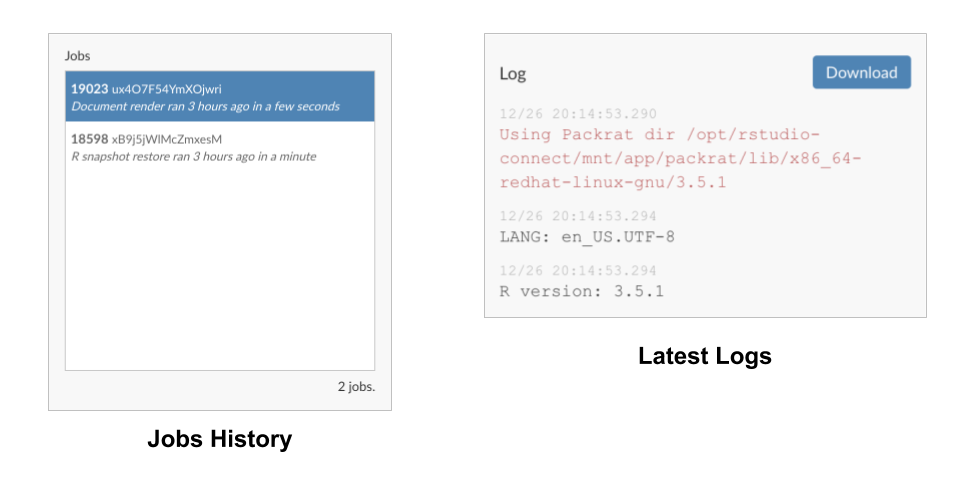
As of RStudio Connect version 1.6.4, log downloads include the full process output and are not size-limited. The RStudio Connect dashboard continues to show only the most recent log output from a process.